.avif)


.avif)


.avif)
How Much Does a Custom Mudroom Cost?
link desc
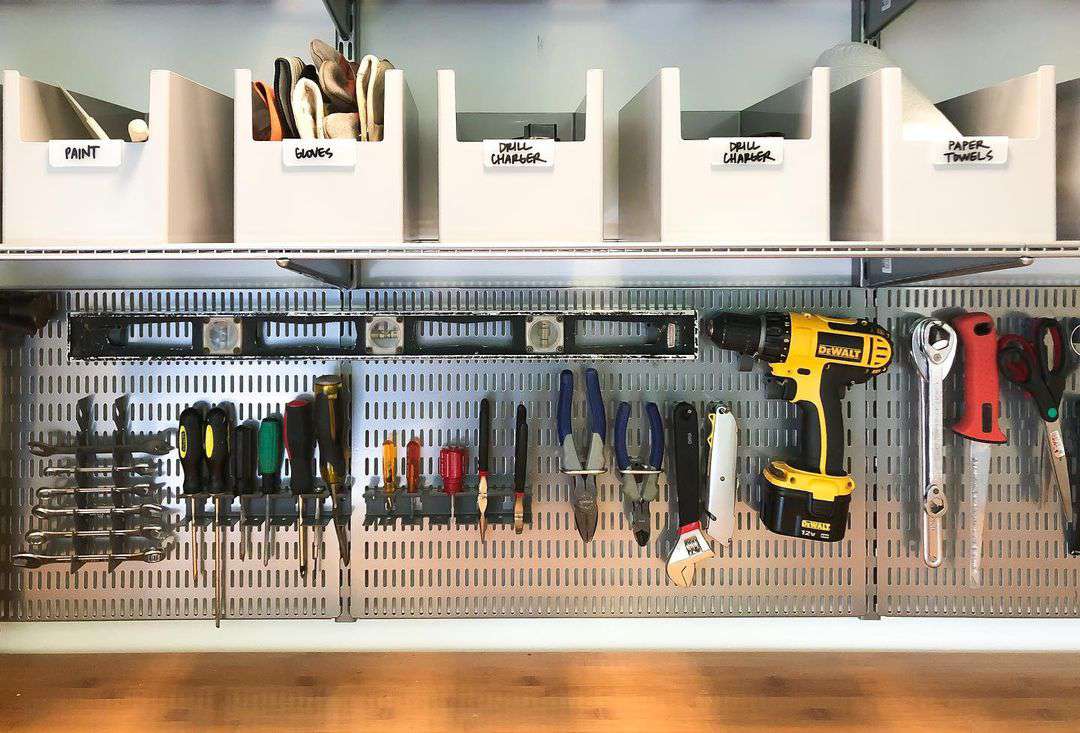


Organize power tools in custom garage cabinets by grouping items by frequency of use, adding pull-out vertical racks and heavy-duty drawer slides for deep shelves, and integrating built-in charging stations that keep batteries plugged in and hidden. A well-planned cabinet layout turns a cluttered garage into a workspace where every drill, saw, sander, and router has a dedicated home sized to its exact dimensions. According to a CRAFTSMAN survey conducted by Stanley Black & Decker, 36% of American garages are so unorganized that homeowners can no longer park a vehicle inside, and 60% of Americans with garages say it is the untidiest area in their house. Power tools are a major contributor to that clutter because they are heavy, oddly shaped, and often surrounded by loose batteries, chargers, and cords that pile up fast. This blog covers how to plan a cabinet layout around your tools, which cabinet features solve the most common storage problems, and how to build a charging station directly into your cabinet system.
Power tool organization in garage cabinets matters because disorganized tools waste time, cause damage to expensive equipment, create safety hazards, and make the garage less functional for every other purpose it serves. According to the CRAFTSMAN survey, 53% of U.S. homeowners use their garage or home workshop for DIY projects. That number represents over 43 million households working with power tools in a space that most of them admit is poorly organized.
Disorganized power tools cost money in two ways. First, tools that are piled on top of each other, stored loose in bins, or left on open shelves get scratched, dented, and knocked out of alignment. A circular saw blade that takes a hit while sitting exposed on a shelf can lose its set, which produces rough cuts and shortens the blade's life. Second, homeowners who cannot find a tool end up buying duplicates. The average homeowner spends over 100 hours per year on DIY-related work, according to Tool Troopers, and a significant portion of that time disappears into searching for misplaced tools rather than completing the actual project.
Safety is the other critical factor. Power tools left loose on the garage floor or stacked on open shelves create tripping hazards and expose sharp blades, spinning chucks, and protruding cords to foot traffic. Children and pets are at particular risk. Custom garage cabinetry with lockable doors and drawers solves both the organization problem and the safety problem simultaneously by enclosing tools behind closed panels that keep them invisible, protected, and out of reach.
You plan a garage cabinet layout for power tools by inventorying every tool you own, sorting tools into frequency-of-use zones, measuring the dimensions of your largest items, and then designing cabinet compartments around those specific sizes and access patterns. Planning the layout before ordering or building cabinets prevents the most common mistake homeowners make: buying generic cabinets with standard shelf spacing that does not fit the tools they actually own.
Start by pulling every power tool out of its current storage spot and laying the full collection on the garage floor or a workbench. Count the drills, saws, sanders, routers, grinders, and specialty tools. Count the batteries, chargers, and accessory kits that go with each cordless tool. Count the extension cords, air hoses, and accessories that support the corded tools. This full inventory becomes the basis for every cabinet dimension and compartment decision that follows.
You group tools by frequency of use by dividing your inventory into three zones: daily-use tools, weekly-use tools, and seasonal or specialty tools. This three-zone system determines where each tool lives within the cabinet layout and how accessible its storage spot needs to be. The AI Overview for this topic puts it directly: keep heavy or daily-use drills at eye level and specialty tools on high or low shelves.
The frequency-of-use zoning system works because it matches the physical ergonomics of how people actually use a garage workspace. Reaching overhead or bending to a bottom shelf for a tool you grab five times a day wastes energy and time. Reaching overhead once a season for a paint sprayer is perfectly acceptable. The zoning system puts the most-used tools in the most accessible positions and pushes infrequently-used items to the margins. According to the CRAFTSMAN survey, 90% of Americans believe a well-organized garage can make a small garage appear larger, and frequency zoning is the single most effective strategy for making a limited cabinet footprint work harder.
The cabinet features that work best for power tool storage are pull-out trays with heavy-duty drawer slides, vertical plywood dividers for upright tool storage, adjustable shelving, deep drawers with foam inserts, and built-in power strips for charging. Standard fixed shelves work for lightweight household items, but power tools are heavy, oddly shaped, and frequently paired with accessories that need their own compartments. The right cabinet features eliminate the "pile everything on a shelf" problem that makes tools hard to find and easy to damage.
The table below matches specific cabinet features to the power tool types they serve best, so you can see which features your layout needs based on the tools you own.
Cabinet FeatureBest ForWhy It WorksPull-Out Trays (heavy-duty slides)Circular saws, miter saws, routersHeavy tools slide out smoothly instead of being lifted from deep shelves; full-extension slides let you access the full tray depthVertical Plywood DividersCircular saws, jigsaws, reciprocating sawsTools slide into custom-width slots upright, protecting blades and saving horizontal shelf spaceDeep Drawers with Foam InsertsCordless drills, impact drivers, oscillating toolsFoam cutouts cradle each tool in its exact shape, preventing movement, scratches, and contact damageShallow Drawers with DividersDrill bits, driver sets, blades, sandpaperSmall accessories stay sorted by type and size instead of mixing together in a single binAdjustable ShelvingBattery chargers, accessory cases, tool bagsShelf height changes as your tool collection grows; no wasted vertical space between itemsIntegrated Power Strip / OutletAll cordless tool batteries and chargersBatteries charge inside the cabinet with the door closed; cords stay hidden and off the workbenchLockable DoorsAll power toolsPrevents unauthorized access, protects children and pets, and secures valuable equipment
Pull-out trays deserve extra attention because they solve the deepest frustration with standard cabinets. A standard 24-inch-deep base cabinet stores items well, but reaching to the back of that cabinet for a heavy circular saw is awkward and risks dropping the tool. Full-extension drawer slides rated for 75 to 100 pounds bring the entire tray out to the front edge of the cabinet, so you can lift the tool straight up instead of reaching in and pulling sideways. Choosing the right cabinet hardware is what separates a cabinet you enjoy using from one that fights you every time you open a drawer.
You need a minimum cabinet depth of 20 to 24 inches for most power tools, a minimum shelf width of 24 inches to fit a standard circular saw flat, and a minimum drawer depth of 6 to 8 inches for cordless drills stored with their battery attached. Standard 12-inch-deep wall cabinets are too shallow for power tools. Standard 24-inch-deep base cabinets work well for most items, and 30-inch-deep workbench-height cabinets provide extra depth for larger stationary tools like benchtop drill presses and thickness planers.
A standard cordless drill with its battery pack attached measures roughly 8 to 10 inches tall, 3 to 4 inches wide, and 8 to 10 inches deep. A circular saw measures approximately 10 to 12 inches long, 8 to 10 inches tall, and 6 to 8 inches wide. A random orbital sander runs about 6 inches in diameter and 5 to 7 inches tall. These measurements matter because a cabinet with 10-inch shelf spacing wastes 2 to 3 inches above a sander but leaves no room for a drill stored upright. Custom garage cabinets solve this by sizing each shelf, drawer, and compartment to the actual tools that will live there, eliminating the wasted space that standard off-the-shelf cabinets produce.
You build a charging station inside a garage cabinet by mounting a multi-outlet power strip to the interior back wall of a dedicated cabinet section, drilling clean-out holes through interior dividers for cord routing, and leaving a small gap or passive vent at the top of the cabinet to prevent heat buildup from charging batteries. The goal is a single cabinet section where every cordless tool battery charges behind a closed door, with cords managed neatly and batteries always ready to grab.
The process follows a logical sequence. First, choose a cabinet section near an existing wall outlet. If no outlet exists nearby, an electrician can install a dedicated 20-amp circuit for the charging station, which is the safest option for garages where multiple batteries charge simultaneously. Second, mount a surge-protected power strip with at least 6 outlets to the back wall of the cabinet interior using screws or heavy-duty adhesive strips. Third, drill 1.5-inch holes through cabinet dividers or the back panel to route charging cords cleanly without pinching them against door edges. Fourth, arrange chargers on a dedicated shelf inside the cabinet, with each charger spaced 3 to 4 inches apart to allow airflow.
Heat management is the detail most homeowners miss. Lithium-ion batteries generate heat during charging, and garage temperatures in North Alabama can push well above 90 degrees during summer months. Storing batteries in a sealed, unventilated cabinet during charging compounds that heat. A small passive vent, a 2-inch gap at the top of the cabinet door, or a drilled ventilation hole covered with a mesh screen allows warm air to escape and extends battery lifespan. Battery manufacturers including DeWalt and Milwaukee recommend charging lithium-ion batteries in environments between 40 and 105 degrees Fahrenheit for optimal performance and longevity.
Yes, you can store power tool batteries in the garage if the storage area stays between 40 and 105 degrees Fahrenheit and humidity remains below 60%, but batteries should be removed from chargers after they reach full charge and stored in a cool, dry cabinet section away from direct sunlight. Leaving batteries on the charger indefinitely can reduce cycle life over time. Storing batteries in a garage that regularly exceeds 105 degrees during summer peaks or drops below freezing in winter can degrade cell chemistry and reduce overall capacity.
A well-designed charging station addresses this by keeping batteries enclosed in a cabinet where temperatures stay more moderate than the open garage air, especially if the cabinet is positioned on an interior wall rather than an exterior wall exposed to direct sun. The cabinet acts as a thermal buffer, slowing the rate at which the interior temperature rises during afternoon heat spikes. Pairing this with the ventilation approach described above creates a charging and storage environment that keeps batteries performing at their best for years. Following a consistent cabinet maintenance routine also catches moisture buildup or heat damage early before it affects the tools or batteries stored inside.
You store power tools to prevent damage by keeping each tool in its own compartment or slot, protecting blades and cutting edges from contact with other tools, managing cords to prevent kinking, and storing tools on stable surfaces where they cannot fall or shift. The two most common forms of power tool damage in a garage are blade and chuck damage from tools piled on top of each other, and cord damage from corded tools being coiled too tightly or pinched under heavy objects.
Vertical plywood dividers inside a base cabinet create custom-width slots where circular saws, jigsaws, and reciprocating saws slide in upright. This upright storage method keeps blades separated, protects the base plates from scratches, and uses less horizontal shelf space than laying each saw flat. Building the dividers from 1/2-inch plywood with 1-inch spacing between slots creates a universal rack that fits most standard saws. The AI Overview for this topic recommends building vertical plywood dividers inside lower cabinets to slide circular saws, sanders, and nail guns in upright, which matches exactly how professional workshops organize their tools.
Cord management is the other major damage prevention issue. Corded power tools have 6 to 10-foot power cords that tangle, kink, and get pinched in drawers and cabinet doors. The best practice is to coil each cord loosely in a 10 to 12-inch loop, secure it with a Velcro strap rather than a zip tie (zip ties create tight pressure points that damage cord insulation over time), and store the coiled cord alongside the tool in the same compartment. Custom cabinetry built for organization includes cord-routing channels and pass-through holes that keep cords contained without crimping them.
Foam drawer inserts provide the highest level of individual tool protection. A 2-inch-thick kaizen foam sheet can be cut with a utility knife to match the exact silhouette of each tool. The tool drops into its custom cutout and stays perfectly still even when the drawer opens and closes. Foam inserts also make it immediately obvious when a tool is missing, because the empty cutout stands out visually. This is the same storage method used in professional tool cribs and aviation maintenance hangars, scaled down for a home garage.
The most common garage organization mistakes are using the wrong storage system for the items being stored, failing to plan the layout before buying cabinets, ignoring vertical wall space, storing items directly on the concrete floor, and not labeling containers and drawers. Each of these mistakes produces a garage that looks organized for the first week and reverts to chaos within a month because the system does not match how the space actually gets used.
The CRAFTSMAN survey found that 85% of Americans cite a well-organized garage as important for productivity and mental wellbeing. Avoiding these five mistakes is the difference between a garage that supports productive work and a garage that produces frustration every time you open a cabinet door.
You should not store propane tanks, gasoline in unapproved containers, oily rags in sealed bins, flammable liquids near ignition sources, or perishable items in an unconditioned garage. These items create fire hazards, produce toxic fumes, or degrade in the temperature extremes that garages regularly reach. The question comes directly from the PAA results for this topic and connects to power tool organization because many homeowners store hazardous materials alongside their tools without realizing the risk.
Propane tanks should always be stored outdoors in an upright position, never inside a garage where a leak can fill an enclosed space with flammable gas. Gasoline must be stored in approved safety containers with proper ventilation. Oily rags, which are common in garages where tools and automotive maintenance overlap, can spontaneously combust if stored in sealed containers. Spread them flat to dry before disposing of them or store them in an approved metal safety can with a self-closing lid.
For the tools and materials that do belong in a garage, a well-designed custom garage cabinet system includes a dedicated lockable section for chemicals like paint, solvents, and adhesives, separating them from the tool storage zones and keeping them out of reach of children. This chemical-storage zone should be positioned away from heat sources and electrical panels, with ventilation gaps that allow fumes to dissipate rather than concentrate inside a sealed cabinet.
You keep your garage tool system organized long term by following a "one in, one out" rule for new tool purchases, returning every tool to its designated spot after each use, purging unused items seasonally, and cleaning cabinet interiors at least twice per year. Organization is not a one-time project. It is a maintenance habit that keeps the system functional month after month.
The "one in, one out" rule prevents the most common long-term failure: tool accumulation that exceeds cabinet capacity. Every time you buy a new drill, saw, or accessory kit, evaluate whether an older tool has been replaced and can be donated, sold, or discarded. This keeps the cabinet system from slowly overcrowding back to the same cluttered state that prompted the organization project in the first place.
A quarterly purge takes 10 to 15 minutes and prevents small disorganization from compounding. Pull each drawer and tray out, check that every tool is in its correct spot, remove items that have migrated into the wrong zone, and wipe down surfaces. This quarterly habit, recommended by multiple professional organizers, costs almost no time and keeps the system running smoothly year-round. A home office benefits from the same quarterly review approach, and the principle applies identically to garage storage.
The best way to organize power tools in a garage is to group tools by frequency of use, store daily-use items at eye level, use pull-out trays and vertical dividers for heavy or oddly shaped tools, and integrate a dedicated charging station for cordless batteries. Custom garage cabinets sized to your specific tool collection provide the most efficient organization because every compartment matches the exact dimensions of the tools it holds, unlike off-the-shelf cabinets with fixed shelf spacing.
The best garage tool organizer is a custom cabinet system with a combination of deep drawers, pull-out trays, adjustable shelving, and integrated power for charging stations. A Stanley Black & Decker survey found that 53% of U.S. homeowners use their garage for DIY projects, and a cabinet system built specifically for tool storage outperforms generic shelving, pegboard, or freestanding tool chests because it protects tools from dust, moisture, and damage while keeping everything behind closed doors for a clean, professional look.
You can organize tools in your cabinet by sorting items into categories (drilling, cutting, sanding, fastening), placing the most-used category in the most accessible drawers, lining drawer bottoms with rubber liners to prevent tools from sliding, using foam inserts for precision tool protection, and labeling every drawer and shelf section by category. Shallow drawers with dividers work best for small accessories like drill bits, blades, and sandpaper. Deep drawers with foam cutouts work best for cordless drills and impact drivers.
Five professional organizing tips for a garage are: inventory every item before buying any storage system; group tools by frequency of use and assign zones accordingly; maximize vertical wall space with slatwall panels or wall-mounted cabinets; label every bin, drawer, and cabinet section; and schedule a quarterly 15-minute purge to prevent small messes from compounding into full disorganization. According to the CRAFTSMAN survey, 90% of Americans believe a well-organized garage makes a small space appear larger, and these five tips are how professionals achieve that result consistently.
You organize a garage full of tools by starting with a complete inventory laid out on the floor, sorting into keep, donate, and discard piles, grouping the keepers by category and frequency of use, measuring the largest tools to determine cabinet and shelf dimensions, and then installing a cabinet system that assigns every tool a dedicated spot. The process works best when the cabinet layout is designed around the tools rather than the other way around. A kitchen cabinet remodel follows the same principle: design the storage around what it needs to hold, not around what sizes happen to be available off the shelf.
Organizing power tools with custom garage cabinets comes down to three decisions: where each tool lives based on how often you use it, what cabinet feature keeps that tool accessible and protected, and how the charging infrastructure supports your cordless battery ecosystem. The frequency-of-use zoning system puts daily tools at arm's reach and seasonal tools out of the way. Pull-out trays, vertical dividers, and foam inserts protect individual tools from the contact damage that open shelving and stacked bins cause. A built-in charging station keeps batteries ready without cluttering the workbench. Together, these three elements turn a messy garage into a workspace that saves time on every project and protects the investment you have made in your tool collection.
If you are ready to design a garage cabinet system around your specific tools and workspace, Classic Cabinetry builds custom solutions with over 44 years of craftsmanship behind every project. Call us at (256) 423-8727 to schedule a free consultation.