.avif)


.avif)


.avif)
How to Design a Home Office and Guest Room Combo With Custom Cabinetry
link desc
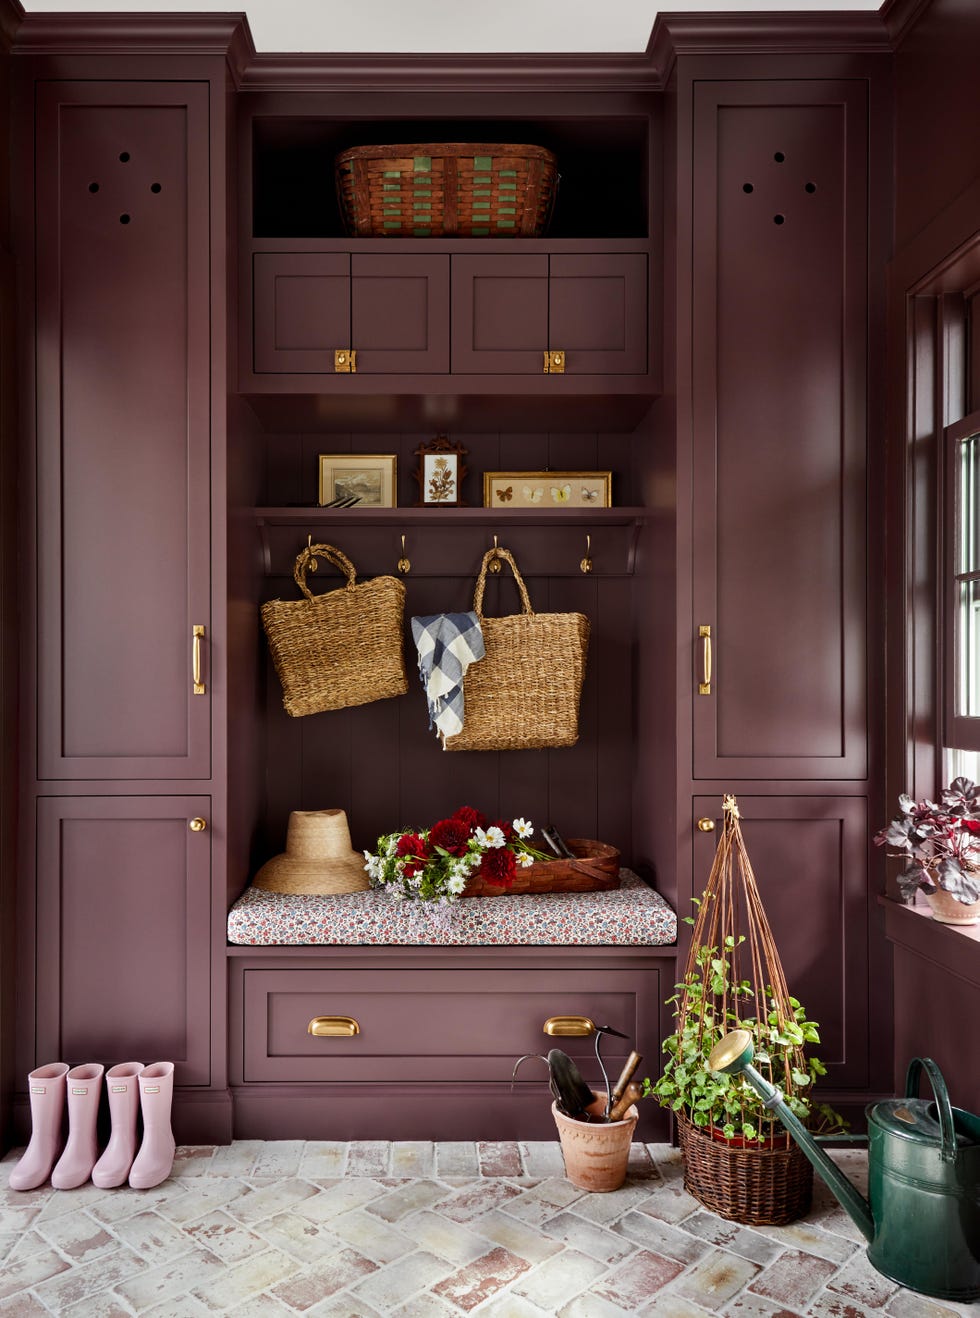


To create a drop zone in your entryway with custom cabinets, build a floor-to-ceiling run with one bay per person, an 18-inch-high bench, bays 15 to 18 inches deep, and two rows of hooks set at 60 inches for adults and 42 inches for children. Those four numbers do most of the work, because a drop zone fails on dimensions far more often than it fails on style. Below we cover where the cabinetry belongs, the four vertical zones inside it, the exact depths and widths each zone needs, how to handle a narrow entry or an open floor plan with no entry at all, and the material and hardware choices that survive wet coats and daily traffic.
A drop zone cabinet is a run of built-in cabinetry just inside an entry door that gives coats, bags, shoes, keys, and mail an assigned place before they reach the rest of the house. The word "assigned" is what separates a drop zone from a coat rack. Every item that comes through the door has one destination rather than whichever surface is closest.
Assignment is also what makes the space hold up over time. A bench with no bins collects a pile within a week, and a wall of hooks with no shoe storage moves the pile to the floor. The cabinet works when each category of item has a compartment sized to it, which is why a drop zone gets designed around an inventory rather than around a wall.
Inventory drives every dimension in the build, and that is where a custom approach separates from a stock one. Our mudroom and foyer cabinetry gets drawn to the family that will use it, since a household with three school-age children needs a completely different bay count and shelf layout than a couple with two dogs.
You create a drop zone in your house by choosing the location first, dividing the run into one bay per person, assigning four vertical zones inside each bay, then setting depth, bench height, and hook heights before any cabinet is drawn. Those decisions happen in that order because each one constrains the next.
Five decisions cover the entire build. Location determines how much wall you have. Bay count divides that wall. Zone assignment fixes what goes where vertically. Dimensions make each zone usable rather than decorative. Materials and hardware determine whether the whole thing still functions in ten years.
Skipping straight to the fifth decision is the common path and the expensive one. Choosing door styles and hook finishes before the bay widths are settled means the pretty cabinet holds two coats where it needed to hold four. The rest of this article works through the five in order.
A drop zone should go at the door the family actually uses every day, which in most homes is the garage entry rather than the front door. Traffic pattern beats floor plan on this decision. A beautiful drop zone at an unused formal entry collects nothing but dust.
Three locations work in most houses. A dedicated mudroom off the garage is the ideal case, since it is already a transition space and already tolerates wet floors. A hallway between the garage and the kitchen works nearly as well, provided the run leaves a clear walkway of at least 36 inches past the cabinet face, which is the minimum clear width recommended for circulation. An unused coat closet is the third and often cheapest option, because removing the door and the front wall converts an enclosed 24-inch-deep box into an open, full-height bay with the framing already in place.
Newer construction across Huntsville tends to put the garage door within a few steps of the kitchen, which makes that short stretch of wall the highest-value cabinet run in the house. Everything that enters the home passes it twice a day.
Closet conversions raise a related decision worth settling early. Hanging space lost to the conversion has to reappear somewhere, and pairing a drop zone with custom closets elsewhere in the house keeps coat storage from simply relocating to a bedroom floor.
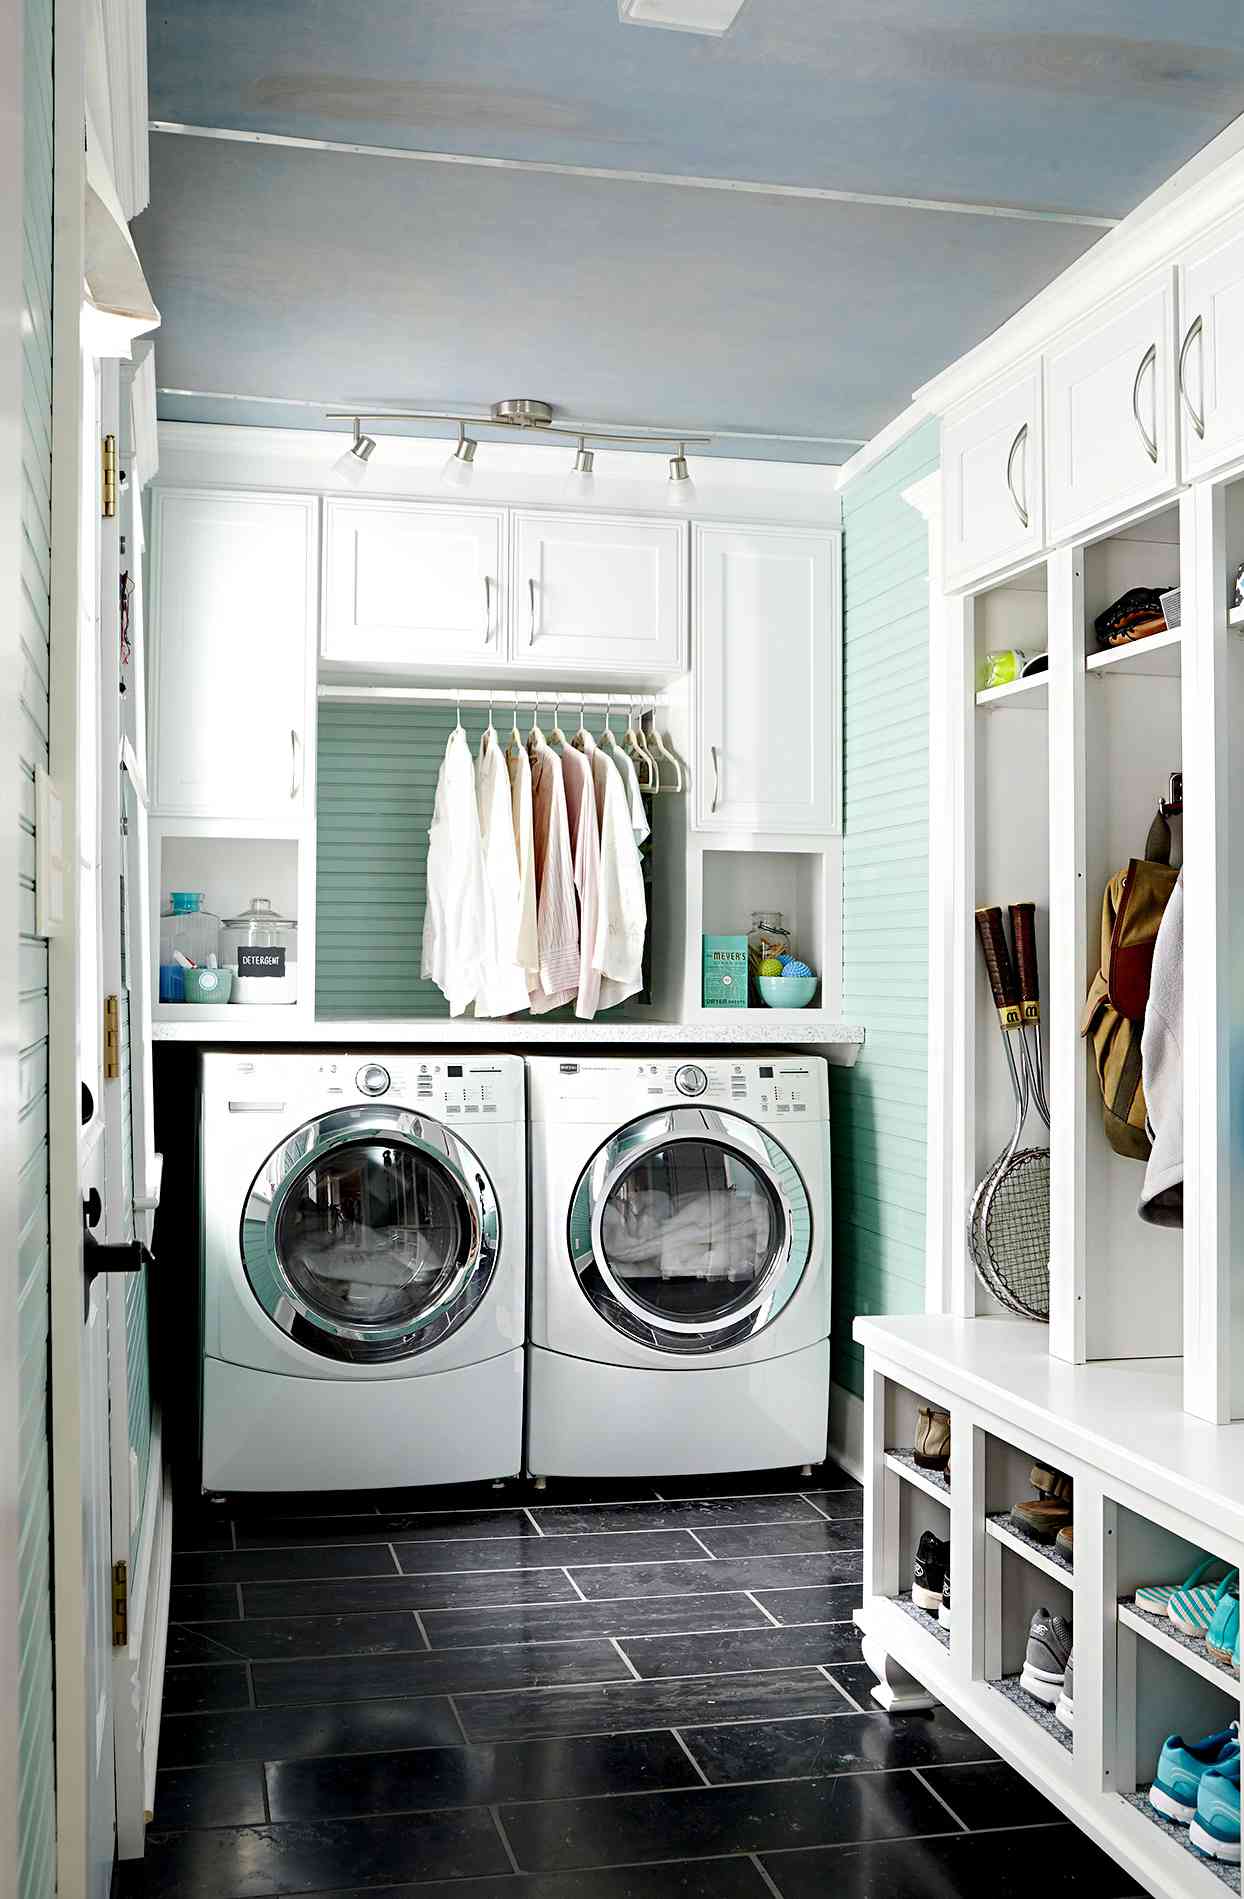
The key elements of a good entryway drop zone are a shoe zone at the floor, a bench at sitting height, a coat and hook zone above it, and a bin shelf at the top. Those four zones stack vertically inside every bay, and each one carries a different category of item at a different height.
The shoe zone occupies the space below the bench and handles the messiest contents in the whole cabinet. Open cubbies work here, and so do pull-out baskets, but the zone needs enough vertical clearance for the tallest footwear in the household rather than the average pair.
The bench does two jobs at once. It gives someone a place to sit while removing shoes, and it forms the horizontal divider between the wet zone below and the dry zone above. That dividing role is why bench height gets set before anything above or below it.
Above the bench sits the coat and hook zone, which is the tallest section and the one that determines overall cabinet depth. The bin shelf caps the run at the top, holding seasonal items in labeled containers where infrequent access costs nothing. Running the cabinetry to the ceiling rather than stopping at 84 inches adds that shelf for almost no additional cost and makes the unit read as built in rather than as furniture pushed against a wall.
A drop zone cabinet should be 15 to 18 inches deep for hooks, 20 to 22 inches deep where the bench needs comfortable seating, and 22 to 24 inches deep only if coats will hang on a rod. Depth is the single measurement that applies to every zone at once, which is why it gets decided before bay widths or shelf heights.
One object sets the threshold. A standard coat hanger measures about 17 inches wide, so any bay meant to hold coats on a rod needs at least 22 inches of interior depth to enclose the hanger and still close a door. Switch from a rod to hooks and that constraint disappears, because a coat on a hook hangs flat against the back panel and needs only 15 to 18 inches.
Hooks are the better choice in most entries for exactly that reason. Dropping from 24 inches to 18 returns half a foot of hallway width, and in a corridor that difference decides whether two people can pass while one is putting on a coat.
Depth also governs how the run reads from the room, since a shallower cabinet sits closer to the wall plane and feels less like an obstruction. We size drop zone cabinetry to the measured opening rather than to a catalog depth, which matters in a hallway where every inch of clear walkway counts.
Each drop zone bay should be 18 to 24 inches wide for an adult or teenager and 12 to 15 inches wide for a young child. Depth stays constant across the run while width divides it, so bay count is really a question of how many people use the door.
An 18-inch bay holds a winter coat and a backpack side by side without either crowding the neighbor. Below 15 inches, a coat and a bag start competing for the same hook, and the second item ends up on the bench. A 24-inch bay feels generous and functions like a personal wardrobe, which suits households where one person carries far more gear than the rest.
Plan one bay per person plus one spare. The spare absorbs guests, sports equipment in season, and the pet leash and towel that otherwise take over someone else's space. Families who skip the spare bay tend to lose the tidiest person's bay to overflow within a year.
A drop zone bench should be 18 inches high, with a working range of 17 to 19 inches. That height matches a dining chair, which is what makes it comfortable for tying shoes. Higher than about 24 inches leaves feet dangling, and lower than 15 inches makes standing back up difficult for most adults.
A 2 to 3 inch toe kick recess at the base of the bench matters more than it sounds. Without it, heels catch the cabinet face when someone stands, which is the detail that separates a bench people use from a bench people avoid.
Every other zone measures from the bench, so the table below gives the full vertical stack in one place.
ZoneHeight Above FloorDepthWidthWhat It HoldsShoe zone0 to 18 in, with 6 to 8 in clearance for sneakers, 10 to 12 in for ankle boots, and 18 to 20 in for tall boots12 to 15 inFull bay widthShoes, boots, pull-out basketsBench18 in seat height, 2 to 3 in toe kick below15 to 18 in for everyday use, 20 to 22 in for seating comfort36 to 48 in for a shared benchSeating, lift-top or drawer storageCoat and hook zoneBench top up to roughly 78 in15 to 18 in for hooks, 22 to 24 in for a hanging rod18 to 24 in per adult, 12 to 15 in per childCoats, backpacks, bagsBin shelfAbove roughly 78 in, to a 96 in ceiling12 to 14 inFull bay widthSeasonal hats, gloves, overflow bins
Sources: NKBA Kitchen and Bath Planning Guidelines (clear walkway and circulation recommendations); 2010 ADA Standards for Accessible Design (reach ranges); ANSI/KCMA A161.1 Performance and Construction Standard; published industry mudroom and locker dimension references.
Coat hooks should be mounted at 60 to 66 inches above the floor for adults and at a second row of 42 to 48 inches for children, spaced 8 to 12 inches apart. Two rows rather than one is the detail that decides whether children use the drop zone or walk past it.
Reach is the whole reason. A hook at 64 inches sits above the shoulder of a seven-year-old, so a backpack that cannot reach its hook lands on the bench instead. A second row at 42 inches puts the same job inside a child's reach, and accessible design practice supports the general principle, since the 2010 ADA Standards for Accessible Design set forward reach between 15 and 48 inches for seated users.
Spacing matters as much as height. Hooks placed 4 inches apart look tidy on a drawing and hold half as many coats in practice, because a winter jacket occupies far more width than the hook it hangs on. Keeping hooks 8 to 12 inches apart means every hook stays usable in January.
Hook style and finish come last, after the heights are fixed. Coordinating hooks with the rest of the cabinet hardware in the run keeps a utility space looking deliberate rather than assembled from spare parts.
You maximize space in a small entryway by going shallower and taller, using hooks instead of a rod, and sharing one continuous bench across all bays instead of building separate lockers. Small entries lose to depth, not to width, so the fix is to take back inches from the front of the cabinet and recover them at the ceiling.
Several tactics work in a tight footprint:
Each of those choices trades a feature for clearance, and clearance is what a small entry is short of. Anyone working with a genuinely tight footprint will find more configuration detail in our writeup on small mudroom cabinets, which covers compact layouts specifically.
You create an entryway in an open concept home by building the drop zone as a freestanding-looking cabinet run that defines the boundary itself, since the floor plan does not supply one. Open plans are the harder case, because there is no hallway and often no wall long enough to hold a full run.
Three approaches work. A tall cabinet run placed perpendicular to the entry door creates a partial wall that screens the view into the living space while holding all four zones on its inward face. A shallow 12-inch bench and hook wall along whatever wall exists beside the door handles the daily load without dividing the room. A back-of-island or back-of-sofa cabinet unit borrows a boundary the furniture layout already implies.
Height is what makes the first option work visually. A run that stops at 60 inches reads as furniture and screens nothing, while one carried to the ceiling reads as architecture and does the dividing job. The same logic behind floor-to-ceiling built-ins applies here, with hooks and cubbies replacing shelves.
A drop zone should have open cubbies in the coat and hook zone and doors on the shoe zone and bin shelf. Splitting the decision by zone works better than choosing one treatment for the whole run, and it follows a simple test: doors go where mess lives, and open bays go where speed matters.
Open bays win in the coat zone because friction determines use. A child who has to open a door before hanging a backpack will drop the backpack, and every added step lowers the odds the system gets used at all. Hooks behind an open bay take one motion.
Doors win below the bench and above the coat zone. Shoes are the least attractive contents in the cabinet and the only ones guaranteed to be dirty, and seasonal bins at the top look better behind a panel than stacked in view. Closing those two zones keeps the run looking intentional while the working middle stays open.
Hardware carries more load in this cabinet than in most, since entry doors and drawers cycle constantly. Selecting cabinet hinges rated for heavy use keeps doors aligned in a location that sees traffic every morning and every evening.
A drop zone needs outlets if it will serve as a charging station for phones, tablets, laptops, or rechargeable devices. Most modern drop zones are asked to do exactly that, which makes electrical a design decision rather than an afterthought.
The National Electrical Code governs where power can go. NEC 210.52(A) requires that no point along a wall floor line sit more than 6 feet from a receptacle, which usually means an outlet already exists somewhere on the entry wall, though rarely at the height a charging drawer needs. A dedicated receptacle placed inside a drawer or behind a cabinet panel keeps cords out of sight and has to be roughed in before the cabinetry goes up.
Placement follows the same zone logic as everything else. A charging drawer sits best in the bench or in a small upper compartment near eye level, away from the wet shoe zone below. A licensed electrician confirms which code edition the local jurisdiction has adopted and handles the rough-in.
Households that want the drop zone to double as a household command center, with mail sorting, a calendar, and device charging, often end up specifying it more like office cabinetry than entry storage. The overlap with home office cabinetry is worth planning for rather than discovering later.
The materials that hold up best in a drop zone are plywood boxes with solid hardwood face frames and doors, finished with a moisture-resistant catalyzed coating. This cabinet takes wet boots, dripping coats, and more daily contact than any other built-in in the house, so substrate choice matters more here than in a living room.
Moisture is the reason. Bare or lightly sealed medium-density fiberboard swells at cut edges once water reaches it, and the shoe zone is where water lands first. Plywood resists that swelling far better, and a properly sealed edge keeps the bottom of the cabinet intact through wet seasons.
North Alabama's humid summers add a second load on top of the wet gear, which is why we build with hardwoods dried to interior moisture targets and specify protective finishes rather than treating the entry like a dry room. The same reasoning behind moisture-resistant materials in a bathroom applies at an entry door.
Hardware carries the other half of the durability question. ANSI/KCMA A161.1, the performance and construction standard for kitchen and vanity cabinets, cycles certified doors 25,000 times and drawers 15,000 times under load, and a drop zone reaches those counts faster than almost any cabinet in the house. Specifying hinges and slides to that level of testing is what keeps the run operating smoothly after years of daily use.
You can build your own drop zone by working through the specifications in dependency order rather than starting with the cut list. The measuring and planning stage determines whether the finished cabinet functions, and it costs nothing to get right.
The sequence runs like this:
Anyone who would rather have the run built and installed to those specifications can have the whole sequence handled at once. We draw custom cabinetry in 3D before anything is cut, which lets a family see the bay count and hook heights against their own measurements first.
The entryway design choices that prevent rework are fixing depth and walkway clearance before cabinet layout, adding a second hook row for children, planning one bay per person plus a spare, and closing only the zones that need closing. Each of those costs nothing at the drawing stage and is disruptive to correct after installation.
Two misses account for most of the disappointment. The first is building a rod-depth cabinet in a hallway that cannot spare the inches, which produces a run that works beautifully and blocks the corridor. The second is a single hook row, which quietly excludes half the household from using the cabinet at all.
Undersizing is the third. A drop zone built for the number of people currently living in the house tends to fail as children grow into adult-sized coats and bags, so sizing bays to adult dimensions from the start avoids a rebuild in five years.
Sequencing prevents all three, since none of them survive a plan that settles clearance and dimensions before aesthetics. The same discipline applies to any built-in cabinets project, where the decisions that matter most are the ones made before fabrication starts.
The difference between a drop zone and a mudroom is that a mudroom is a room while a drop zone is a cabinet run that can sit inside a mudroom, a hallway, or an open living space. A mudroom implies enclosed square footage with its own floor and often a utility sink. A drop zone needs only a wall, which is why homes without a mudroom can still have one.
You can turn a coat closet into a drop zone, and it is often the least expensive route available. Removing the door and the front wall converts an enclosed box roughly 24 inches deep into an open, full-height bay with framing already in place. The main considerations are relocating the hanging space the closet provided and patching flooring where the original threshold ran.
You need about 4 feet of wall width and 18 inches of depth for a functional two-bay drop zone, plus a clear walkway of at least 36 inches in front of it. A family of four is comfortable with 7 to 9 feet of wall, allowing four bays plus a spare. Height is free, since running the cabinetry to the ceiling adds storage without consuming any floor area.
A drop zone should match the kitchen cabinets in door profile and hardware when the two are visible from each other, which is common in homes where the garage entry opens near the kitchen. Color can differ, and a deeper or more saturated finish in the entry often works well, since the space is small and takes more abuse. Matching the door profile is what holds the two runs together visually.
Stylish design ideas for a small entryway foyer include running cabinetry to the ceiling for a built-in look, using a wall-mounted floating bench to keep the floor visible, adding a shiplap or beadboard back panel behind open bays, and installing a single decorative light above the bench. Each choice adds visual interest without consuming depth the space cannot spare.
You keep a drop zone organized long term by assigning each bay to a specific person, using labeled bins for anything that lives on the top shelf, and resetting the shoe zone seasonally as footwear changes. Systems fail when a compartment has no owner, since unowned space becomes shared space and shared space becomes overflow. Low latches and reachable hooks matter for younger children, and the same thinking applies to how you baby-proof cabinets in a busy entry.
A mudroom adds value to a home, since organized storage ranks consistently high in buyer preference research. The NAHB study What Home Buyers Really Want places garage storage among its most wanted features at 81 percent of buyers rating it essential or desirable, and a laundry room tops the full list at 86 percent, with laundry and mudroom combinations rated highly. Survey data also indicates that roughly 75 percent of people report an organized home environment helps reduce stress.
A drop zone succeeds on four numbers settled before anyone picks a finish: 18 inches of depth for hooks, 18 to 24 inches of width per person, an 18-inch bench with a toe kick, and two hook rows at 60 and 42 inches. Get those right and the cabinet gets used every day by everyone in the house. Get them wrong and you have handsome cabinetry that the family walks past on the way to dropping things on the counter. Run the cabinetry to the ceiling, close the shoe zone and the bin shelf, leave the coat zone open, and build the box from plywood with a finish that shrugs off wet boots.
We have been building entry and mudroom cabinetry from our Ardmore shop for more than four decades, and the drop zones that work are almost always the ones planned around a real inventory rather than a photograph. If you have a wall or a closet you think could take one, Classic Cabinetry is glad to measure it and lay out the bays with you.
A free estimate is an easy way to start.