.avif)


.avif)


.avif)
Built-In Bookshelves With a Reading Nook, How to Create One
link desc
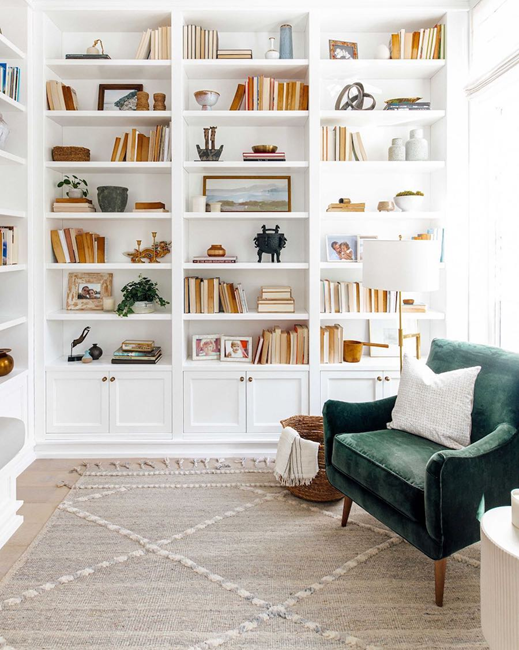


Create built-in bookshelves with a reading nook by framing a central bench between two tall shelf towers, securing the whole framework into wall studs, and finishing with face frames and trim so the unit reads as part of the house. The bench sets the width, the towers set the height, and the trim is what turns three boxes into architecture.
Below we walk through the measurements, the bench structure, the shelf spans that keep books from bowing the wood, the anchoring, the trim, the finish, and the lighting that makes the nook usable after dark.
You create built-in bookshelves with a reading nook in six steps: plan and measure, build the bench and base, construct the shelf towers, anchor everything to the wall, add face frames and trim, then fill, caulk, and paint. Working in that order matters because each step depends on the one before it being square, level, and fastened.
A nook is worth the effort because it changes behavior. The United States Bureau of Labor Statistics reports that Americans aged 15 and over read for an average of 16 minutes a day, against 2.6 hours of television, and a dedicated seat with books within arm's reach is one of the few physical changes that moves that number in a household. Our built-in bookshelves start from that premise: the seat and the shelves get designed together, not separately.
Here is the full build sequence:
Step one carries the most weight, because every cut after it depends on numbers taken before anything is built.
Plan and measure a reading nook by recording the wall height at both ends, the usable width, the intended depth, and every obstruction inside the footprint. Leave about an inch of clearance below the ceiling so the tower can be tipped into position without scarring the drywall, then make that inch disappear under crown molding at the end.
Measuring at both ends is not optional. Ceilings vary across the same wall in most houses, and across North Alabama we work in plenty of homes where a 20-foot run of ceiling drops half an inch from one end to the other. A tower cut to a single measurement fits perfectly at one end and leaves a visible wedge at the other.
Record all of the following before a single board is cut:
Skipping that inventory is where most projects go sideways, and the same class of oversight shows up in the planning mistakes we see on built-in cabinetry generally. With the obstructions mapped, the next question is how much room the seat actually needs.
A reading nook bench should be 36 to 42 inches wide between the two shelf towers. Thirty-six inches seats one adult comfortably with a cushion and a pillow, and 42 inches leaves room to turn sideways and put your feet up, which is how most people actually read.
Width below 36 inches starts to feel like a chair with walls. Width above 48 inches changes the structure, because the bench platform then spans far enough that it needs intermediate support underneath rather than just a perimeter frame.
Built-in bookshelves should be 12 to 15 inches deep for books, with 10 to 12 inches serving as the general-purpose depth in published furniture design references. Twelve inches holds hardcovers, trade paperbacks, and most oversized art books with their spines flush to the face frame.
Shelf spacing follows depth. Eight to 12 inches of vertical clearance covers standard book heights, with one or two taller openings reserved for folios, albums, and display pieces. The bench itself sits deeper than the shelves in most of our designs, usually 18 to 22 inches, so the seat has real seating depth while the shelves stay shallow enough to keep every spine visible.
Build the bench and base by framing a recessed toe kick from 2x4 lumber, decking it with 3/4-inch plywood, and shimming the whole frame dead level before anything gets fastened. A finished seat height of 17 to 18 inches matches standard chair height, which is what makes the bench comfortable rather than merely usable.
The toe kick does two jobs. Setting the frame back 3 to 4 inches from the face keeps your toes clear when you stand at the shelves, and lifting the box off the floor protects the bottom panel from mop water and floor moisture.
Platform construction depends on span, and this is where plans go wrong. A 3/4-inch plywood deck over a 36-inch perimeter frame carries one adult without flexing. The same deck across 60 inches of open frame flexes under two, so a bench that wide needs a center support or a doubled platform. Build for the heaviest realistic use, not the photograph.
Hidden storage goes in at this stage or not at all. A lift-up lid with soft-close hardware turns the bench into a blanket box, and cabinet doors on the front face give the same volume with easier daily access. Either choice has to be framed now, because adding it after the towers are anchored means taking the bench apart.
Build the bookshelf towers from 1x12 lumber or hardwood-veneered plywood for the sides and shelves, with at least one fixed shelf to hold the carcase square and shelf pin holes for the rest. A 1/4-inch plywood back panel squares the frame, stiffens the whole box, and keeps the wall behind it clean.
Joinery choice follows the finish. Pocket-hole screws and wood glue work for painted units because the fasteners disappear under filler, while a stained hardwood unit needs joinery that stays invisible on its own. Either way, the fixed shelf is structural, not decorative, and it belongs near the middle of the tower where the carcase wants to rack.
Material also drives how far each shelf can run, and the wood species you pick changes those limits more than most homeowners expect. Running the towers from floor to ceiling instead of stopping at eight feet uses the full wall, and the case for floor-to-ceiling shelving is the same in a reading nook as anywhere else: the storage is free once the structure is already there.
A bookshelf can span 30 to 36 inches in 3/4-inch plywood, 36 to 42 inches in 3/4-inch solid maple, and only 24 to 30 inches in 3/4-inch pine before sag becomes visible. Those limits assume a mixed book load of 20 to 25 pounds per linear foot, which is what published woodworking references give for a full shelf of ordinary books.
Span punishes you faster than any other variable. Deflection increases with the cube of the span, so doubling a shelf's length multiplies the sag roughly eightfold. Thickness works the same way in your favor: moving from 3/4-inch to 1-inch stock makes a shelf about 2.4 times stiffer. Depth helps only linearly, and a deeper shelf also holds more books, so depth never rescues a span.
The figures below follow the woodworking convention of holding sag to about 0.02 inch per foot of span, the threshold at which the eye stops catching the curve against the straight line of the shelf above.
Shelf material (3/4 inch, 12 inches deep)Maximum practical spanBehavior under loadPine or soft lumber24 to 30 inBows first and keeps creeping under sustained weightVeneered plywood30 to 36 inStable at moderate loads, stiffer with a hardwood nosingSolid maple or comparable hardwood36 to 42 inHolds flat at 20 to 25 lb per linear footAny of the above with a continuous rear cleatRoughly doubleRear support carries much of the load off the spanDense hardcovers or binders, any materialReduce by 6 to 8 inLoad climbs to 30 to 40 lb per linear foot
Composite Panel Association guidance is the useful detail in that last row but one: a continuous rear cleat on a 12-inch-deep shelf can roughly double the allowable span, which is why our towers get a real back rather than an open frame. That single construction choice is the difference between shelves that stay flat for decades and shelves that smile at you after three years.
Built-in shelves should be adjustable, apart from the one or two fixed shelves that keep the carcase square. Adjustable shelving costs slightly more at build time and saves the unit from obsolescence, because a shelf spacing chosen for today's books rarely suits the collection ten years from now.
Pin spacing and pin rating both matter. Holes drilled at 32-millimeter or 1-inch intervals give useful adjustment without weakening the side panel, and heavier pins rated for real shelf loads prevent the dimpling that light-duty pins leave in a side panel under a full run of hardcovers.
Anchor built-ins to the wall by prying away the existing baseboard and crown in the work zone, locating the studs, and driving screws through the carcase backs directly into framing. Removing the old trim is what lets the unit sit flush against the drywall, and flush is the entire difference between a built-in and a bookcase pushed against a wall.
Position the bench first, then set the towers on either side and fasten them to the bench and to each other. Screws go through the rear rails into studs, never into drywall anchors alone. A loaded tower is a tall, heavy object in a room where people reach upward, and framing is the only thing that should be carrying it.
Walls will not cooperate, and that is normal. Drywall corners build up, studs bow, and floors run out of level, so the back edge of a tower rarely meets the wall in a clean line. Scribing solves it: hold the unit plumb, trace the wall's actual contour onto the stile with a compass, and cut to that line so the piece fits the wall it has instead of the wall it should have had. Every one of our custom bookshelves gets scribed on site for exactly this reason.
Add face frames and trim by attaching 1.5-inch poplar or pine strips across the front edges of the carcase, then returning the room's baseboard along the bottom and capping the top with crown molding. Face frames hide raw plywood edges and give the shelves the visual thickness that reads as cabinetry rather than shelving.
Trim is what makes the illusion work. Baseboard carried across the bench front ties the unit to the floor line, scribe molding or a thin side trim closes the gap where the tower meets the wall, and crown at the ceiling closes the installation clearance you left in step one. Matching the existing profiles in the room matters more than choosing a handsome one, because a built-in that wears the house's own trim reads as original construction.
Shelf edges deserve the same treatment. Applying a 1x2 strip to the front of each shelf hides the ply edge, adds visible thickness, and stiffens the shelf against the span limits in the table above. Three benefits from one piece of trim is an unusually good return.
Fill, caulk, and paint built-ins by packing every nail and screw hole with wood filler, sanding smooth, caulking each seam where wood meets drywall or trim, then applying primer followed by two coats of durable cabinet or trim enamel in satin or semi-gloss. The caulk line is the step that sells the whole project, because a sealed seam is what the eye reads as "this was always here."
Finish selection carries the long-term result. Satin and semi-gloss enamels wipe clean and resist the hand traffic a reading nook sees, and a sprayed catalyzed finish applied in a controlled shop outlasts a brushed field finish by years. The differences between cabinet finishes are worth knowing before you commit, since the finish is the part you touch every day.
Humidity decides durability here in Ardmore and across the surrounding region, where summer moisture stays high for months. Sealing every face and edge, cut edges included, keeps panels dimensionally stable through the seasonal swing, and letting the finish cure fully before cushions and pillows go in prevents fabric from printing itself into soft paint.
Light a reading nook with two layers: a task light at the seat for reading and an accent light washing the shelves for atmosphere. A single overhead fixture leaves the reader's own shadow across the page, which is the most common reason a beautiful nook goes unused after dark.
Sequencing is the part nobody mentions. Wiring runs before trim and paint, so the decision about integrated lighting has to be made at design, not after the unit is finished. Retrofitting a hardwired sconce or an LED channel into a painted built-in means opening trim you just caulked. We plan lighting into the drawings from the start, applying the same layering logic behind effective task lighting anywhere else in the house.
Light also affects what sits on the shelves. The Library of Congress notes that light damage to books is cumulative, meaning long exposure to dim light does as much harm as brief exposure to bright light, and recommends keeping collections out of direct sun. Warm bulbs on a dimmer serve the reader and the books at the same time.
Make built-in shelves in a nook or alcove by measuring the opening at three heights and two depths first, then building the unit slightly undersized and closing the difference with scribe molding. Alcoves are almost never parallel, and an assembly cut to a single width will bind on the way in or leave a gap once it is in.
Recessed alcoves are the easiest built-ins to make convincing, because the enclosure already exists architecturally. Chimney breasts, dormers, stair landings, and the dead space beside a closet all offer a three-sided opening that only needs shelves, a seat, and trim to become a room within a room.
Converted closets work the same way. Pulling the doors, lining the interior with shelving, and adding a bench turns a shallow box into an enclosed nook, which is the same spatial thinking behind our custom closets approach of using every inch of a fixed footprint.
Nooks also pull double duty. A bench with shelves above handles reading on a Sunday and a laptop on a Tuesday, and pairing the design with home office cabinetry on the same wall gives one room two functions without two renovations.
Modernize existing built-in bookshelves by replacing dated trim profiles, adding shelf-edge banding for thickness, painting the unit the same color as the surrounding wall, and adding integrated lighting. Those four changes alter the entire read of a unit without touching its structure.
Color carries most of the effect. Painting shelves, back panels, and surrounding wall a single saturated shade makes the built-in read as architecture instead of furniture, and it is the lowest-cost change on the list. Swapping fixed shelves for adjustable pins and adding doors to the lower section handles the function side of the update.
Buying a bookcase is cheaper at the moment of purchase, and building one is cheaper across the life of the wall. A freestanding unit arrives in a fixed width, so a 94-inch wall fitted with 32-inch boxes leaves dead space that gets filled with trim, and dead wall in a nook is storage you paid for and cannot use.
Load rating separates them next. Mass-produced bookcases are often built with thin panels and light-duty pins that reach their span limits well before a solid or veneered shelf does. Fit is the third difference, since a built unit lands on your exact ceiling height, your exact wall length, and your out-of-square corner instead of fighting all three. The same comparison plays out across cabinetry built rather than bought.
Built-in bookshelves are expensive because the price includes design time, shop fabrication to non-standard dimensions, on-site scribing and installation, and a finish applied under controlled conditions. None of those costs exist for a flat-packed box produced in volume to one size.
Installation is the share people underestimate. Removing trim, locating framing, scribing to an uneven wall, fitting face frames, caulking every seam, and finishing on site is skilled labor measured in days, and the same labor component drives why cabinet pricing surprises homeowners across every room of the house.
The cheapest way to create built-in bookshelves is to build in around shelving you already own: remove the baseboard behind existing bookcases, push them flush, join them together, then add a face frame, side trim, and crown so they read as one unit. Painting everything a single color finishes the effect.
That approach works best when the existing cases are reasonably solid and close to the right height. It works poorly when the shelves already sag, since trim does nothing for a bowed shelf and the problem only worsens under sustained load.
Yes, built-in bookshelves add value to a home. The National Association of Home Builders found in its 2024 What Home Buyers Really Want study that 72 percent of buyers rate built-in shelving in the main living space as essential or desirable, a figure that has held steady since 2012 at 71 percent.
Resale data points the same direction. The National Association of Realtors Remodeling Impact Report places built-in projects such as bookcases in the range of roughly 60 to 80 percent cost recovery at resale when the work is professionally executed, and Houzz research found that 76 percent of renovating homeowners now add at least one built-in feature during a remodel.
Perception does the rest. A wall of integrated library cabinetry with a seat in the middle reads to a buyer as a finished, considered house rather than a room awaiting furniture, and that impression forms in the first few seconds of a showing.
The bookshelf rule most often cited in styling is the 60-30-10 ratio: 60 percent of a shelf holds books, 30 percent holds objects such as ceramics, framed art, or baskets, and 10 percent stays empty. The negative space is what separates a styled shelf from a storage shelf.
Built-in bookshelves take 4 to 6 weeks from design approval to finished installation on our projects, with the on-site installation itself running a few days. Shop fabrication accounts for most of that window, since the carcases, face frames, and finish are completed before anything arrives at the house.
Yes, you can build a bookshelf around a window, and a window is the ideal center for a reading nook. Run shelf towers up either side of the window casing, set the bench beneath the sill, and bridge the top with a shallow shelf or a run of upper cabinets so the window sits framed inside the unit.
A face frame is a flat wood frame applied to the front edges of a cabinet carcase, usually from 1.5-inch poplar or pine. On a bookshelf it hides raw plywood edges, stiffens the opening, and gives the unit the visual thickness that makes it look built rather than assembled.
Yes, bookshelves sag over time when the span exceeds what the material can carry. Wood creeps under sustained load, so a shelf that looks flat on installation day can develop a visible curve over several years. Keeping spans inside 30 to 36 inches for 3/4-inch plywood and adding a continuous rear cleat prevents it.
Built-in bookshelves vary widely in cost because wall length, material, finish, and whether a bench or lighting is included all move the number independently. A measured quote based on your actual wall is the only figure worth planning against, which is why we provide a 3D design and an itemized estimate before any work begins.
Books should be stored upright, supported at both ends, out of direct sunlight, and in a cool environment. The Library of Congress recommends keeping book collections below 70 degrees with regular dusting, and notes that light exposure is cumulative, so shelves facing a bright window benefit from UV-filtering shades.
Built-in bookshelves with a reading nook come together in a fixed order: measure at both ends of the wall, frame a level bench at 17 to 18 inches with a 36 to 42 inch opening, build towers with shelf spans inside their material limits, anchor into studs, trim to match the room, then caulk and finish. Get the spans and the anchoring right and the unit stays flat and solid for decades. Get the trim and the caulk right and it looks like the house came with it.
We have been building cabinetry out of our Ardmore shop for more than four decades, and reading nooks are among the most satisfying walls we work on, because the room changes the day the cushion goes in. If you have a wall, an alcove, or a stair landing you have been looking at for years, Classic Cabinetry will measure it, show you a 3D design before anything is built, and handle the scribing and finish work that separates a built-in from a bookcase. Reach out whenever you are ready for a free estimate.